Creating a wooden car for your child is a rewarding project that combines craftsmanship, creativity, and the joy of giving a handmade gift. Wooden toys offer a timeless appeal and encourage imaginative play, fostering essential developmental skills. Let’s delve into the steps involved in crafting a wooden car, from choosing the right materials to assembling and adding those personalized touches. How to make a wooden car for kids?
Gathering Your Supplies: Tools for the Job
Before you begin your woodworking journey, gather the necessary tools and materials.
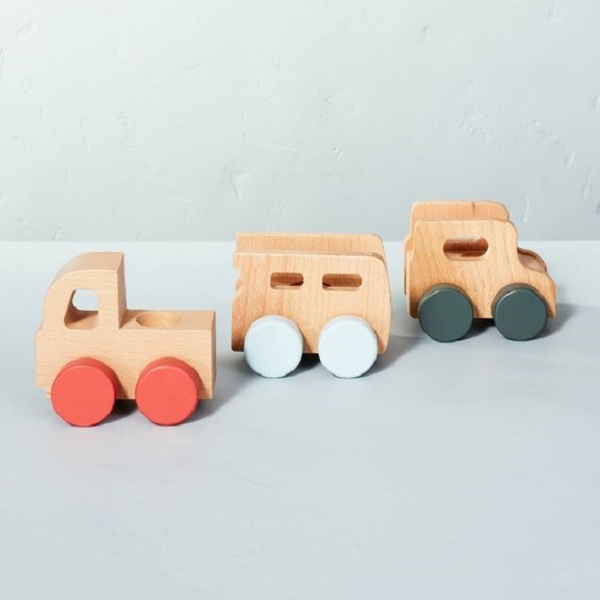
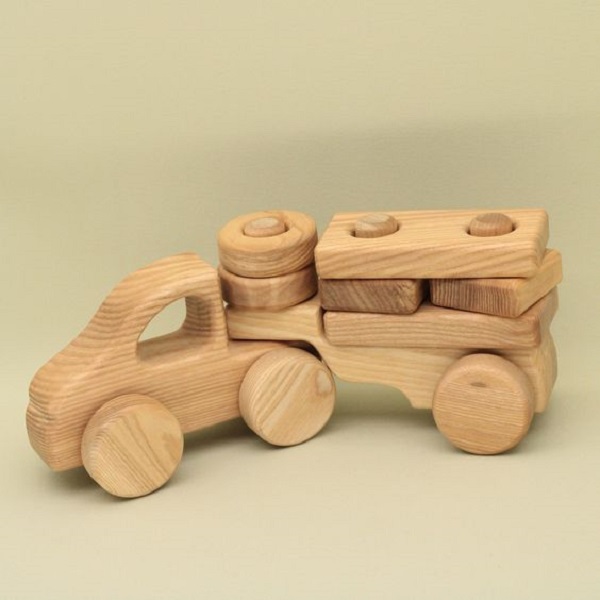
- Wood: Select a type of wood that’s sturdy and safe for children, such as pine, plywood, or MDF (medium-density fiberboard).
- Saw: A hand saw or jigsaw will be needed to cut the wood into the desired shapes.
- Drill: A drill with various drill bits is essential for creating holes for axles and attaching wheels.
- Sandpaper: Sandpaper in varying grits will help smooth rough edges and surfaces, ensuring a safe and splinter-free toy.
- Wood Glue: Wood glue is used to securely bond the various parts of the car together.
- Screws or Nails: Screws or nails may be needed for additional reinforcement, depending on the design and construction.
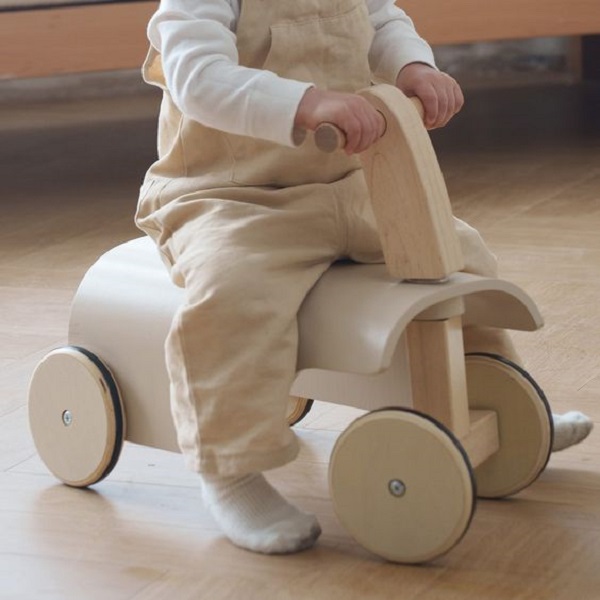
- Wheels: Choose sturdy wheels that are appropriate for the size and weight of your car. You can find wooden wheels, plastic wheels, or even repurpose old toy wheels.
- Axles: Wooden dowels or metal rods can serve as axles for the wheels.
- Paint and Decorations: Non-toxic paints, markers, or stickers can be used to add color and personality to your creation.
Designing Your Car: From Blueprint to Reality
Now comes the exciting part: designing your wooden car!
- Sketch Your Design: Start by sketching out your desired car design on paper. Consider the size, shape, and features you want to include. You can find inspiration online or in books, or let your imagination run wild and create a unique design.
- Create a Template: Once you’re happy with your sketch, transfer it onto cardboard or thicker paper to create a template. This will serve as a guide for cutting the wood pieces.
Design Considerations:
- Simple Shapes: Start with simple shapes that are easy to cut and assemble, especially if you’re a beginner.
- Age-Appropriateness: Consider your child’s age and abilities when designing the car. Younger children might prefer simpler designs with larger pieces, while older kids might enjoy more intricate details.
- Safety First: Avoid sharp edges or small parts that could pose a choking hazard. Ensure all components are securely attached.
Cutting and Shaping: Bringing Your Design to Life
With your design and template ready, it’s time to start cutting and shaping the wood.
- Trace the Template: Trace the template onto your chosen wood pieces.
- Cut the Pieces: Carefully cut out the wood pieces using a saw or jigsaw. Take your time and follow the lines of the template for accurate cuts.
- Sanding: Smooth all edges and surfaces with sandpaper, starting with a coarser grit and gradually moving to a finer grit for a polished finish.
- Drill Holes: If your design includes holes for axles or other attachments, carefully drill them using the appropriate drill bit size.

Assembly: Connecting the Pieces
Now it’s time to assemble the various components of your wooden car.
- Dry Fit: Before applying glue, do a dry fit to ensure all the pieces fit together correctly. Make any necessary adjustments or sanding at this stage.
- Apply Wood Glue: Apply wood glue to the joining surfaces of the wood pieces. Press them together firmly and hold them in place until the glue sets. You can use clamps or weights to help secure the pieces while the glue dries.
- Attach Wheels and Axles: Insert the axles through the pre-drilled holes and attach the wheels securely. Ensure the wheels spin freely and are properly aligned.
- Additional Reinforcement: If needed, add screws or nails for additional reinforcement, especially in high-stress areas.
Assembly Tips:
- Follow Instructions: If you’re using a pre-designed plan or pattern, carefully follow the assembly instructions provided.
- Patience: Take your time during assembly and ensure each piece is securely attached before moving on to the next step.
- Let it Dry: Allow ample drying time for the wood glue before handling or playing with the car.
Creating a wooden car for your child is a labor of love that combines craftsmanship, creativity, and the joy of giving a handmade gift. By following these steps and prioritizing safety and age-appropriateness, you can build a cherished toy that sparks imagination, encourages active play, and provides lasting memories.
Remember, the beauty of a DIY project lies in the personalization and the sense of accomplishment it brings. So, gather your tools, unleash your creativity, and embark on this rewarding journey of crafting a wooden car that your child will treasure for years to come.
Painting and Decorating: Unleashing Creativity
Once your wooden car is assembled, it’s time to add a splash of color and personality.
Non-Toxic Paints
Use non-toxic, water-based paints that are safe for children. Choose bright and cheerful colors that will capture your child’s imagination.
Stencils and Stickers
Stencils or stickers can help you create intricate designs or add fun details like racing stripes, flames, or animal faces.
Natural Wood Finish
If you prefer a more natural look, consider leaving the wood unpainted and simply sealing it with a clear, non-toxic finish to protect it from moisture and wear.
Personalized Touches
Add your child’s name or initials to the car for a personalized touch. You can also let your child participate in the decorating process, fostering their creativity and sense of ownership.
Safety First: Essential Precautions
Safety should always be a top priority when making toys for children.
-
Smooth Edges: Ensure all edges and surfaces are thoroughly sanded to prevent splinters.
-
Secure Attachments: Double-check that all wheels, axles, and decorative elements are securely attached to prevent them from coming loose and becoming choking hazards.
-
Non-Toxic Materials: Use only non-toxic paints, glues, and finishes that are safe for children.
-
Age-Appropriateness: Consider your child’s age and developmental stage when choosing the design and complexity of the car. Avoid small parts or sharp edges that could be hazardous for younger children.
-
Supervision: Always supervise your child while they’re playing with the wooden car, especially if they’re younger or prone to putting things in their mouths.
Beyond Cars: Exploring Other Wooden Toy Creations
The skills and techniques you learn from making a wooden car can be applied to other creative woodworking projects for kids.
-
Wooden Animals: Craft adorable wooden animals like elephants, giraffes, or dinosaurs. These can be painted or left natural and provide endless opportunities for imaginative play.
-
Building Blocks: Create a set of colorful wooden building blocks in various shapes and sizes. These classic toys encourage creativity, problem-solving, and fine motor skills.
-
Puzzles: Design and cut simple wooden puzzles with large pieces for toddlers or more complex puzzles for older children.
-
Dollhouses and Furniture: Build miniature dollhouses and furniture from wood, providing a platform for imaginative play and storytelling.
Conclusion
Making a wooden car for your child is a fulfilling and meaningful project that combines craftsmanship, creativity, and the joy of giving. It’s an opportunity to create a unique and cherished toy that will spark imagination, encourage active play, and provide lasting memories.
With a little effort and attention to detail, you can craft a wooden car that’s both safe and fun, fostering your child’s development and bringing a touch of handmade magic to their playtime.